


I’m not entirely sure how I ever survived without Blogstomp. I know that before using this program, it would take me at least an hour to get images ready for facebook or my blog posts. It was a lot of work for me to individually watermark each photo in CS5, and just such a time consuming process!
I kid you not – I can now get an entire session ready for a full blog post within three minutes. Probably less! Tonight I just wanted to walk you through how I use Blogstomp, and if it’s something that helps you – then great! If not, that’s okay too! This is something that works so incredibly well for me, and I’m so stoked to have such a powerful tool in my arsenal!
Preparing for stomping:
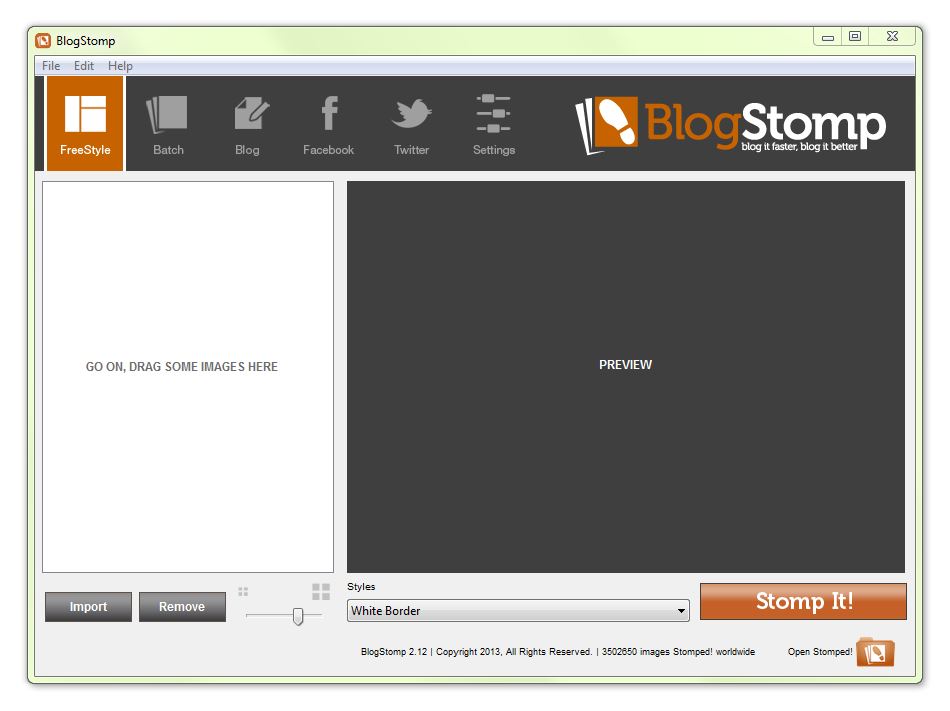
When you open up Blogstomp on your computer, this is what you see:

This is where all the magic happens! Before you get started with importing any photos and stomping them, you’ll want to be sure that you’ve set up your styles! There are four different styles you can stomp with – white border, black border, white tab, and black tab. With each of those you can customize them! I have a white tab customized with my logo for facebook usage, and then I just use a regular white border for my blog post photos. I don’t do anything else with them, although there are a lot of changes you can make! Once you’ve decided what you want for each type of “style” then those are saved and will be the same each time you use them – until you decide to make a change to them. 
Before I stomp any photos, I also be sure that I change the “output,” so that my photos are going into the appropriate folder and are easy for me to find when it is time to blog! For my photo sessions, I put all the photos from the session in a BLOG subfolder of their session. Any other photos go right into my regular “blog” folder. (I plan to write a post soon about how I organize and back up my photos!)

Importing and Stomping:
Once I’ve changed my output settings, I go ahead and hit “import” on the main page of the program (the one you see when you open up Blogstomp). I then select all the images I want to stomp and hit open. 
I typically stay within the “freestyle” tab, as I like to create variations of how my photos are put together. When you freestyle with Blogstomp, you are able to make your own mixes of photos, just by holding down the control button (I don’t know what it is for a Mac, as I don’t use a Mac for editing) and clicking the photos I want to pair up. It really allows you to mix and match the photos into a collage. When you have more than one photo selected, you can click “mix it up,” to switch the photos around to your heart’s deepest desires.

You can also stomp single photos. When you’re ready to save/stomp the photo to its selected output folder, you just hit “Stomp it” and it stomps it super fast, and also removes the photo from the left hand column of all the photos so you don’t worry about duplicates! Unless of course, you imported a duplicate by mistake, then it’ll probably happen :p But otherwise, it’s a great way to keep track of which photos you have left!
There’s also the “Batch” tab, where you can stomp all of your photos at once – but only if you want to stomp the photos as individual images. It’s pretty handy!

Like I mentioned earlier, I use the white tab for photos I’m posting to facebook, which I send to their own special folder. At any point during the process of getting photos ready for the web, you can change the style from a white border to a white tab, or any other one you want to use! 
How to find the stomped images:
Once you’ve finished stomping all of your folders, and you exit out of the program, the folder you saved the images to automatically pops up. You can also look at those images just by clicking on “Open Stomped” right under the “Stomp It” button. 
This tool seriously changed my workflow in such a big way! I’m so glad the Showiteers group mentioned Blogstomp and that I checked it out. I don’t think I’ll ever go back to watermarking my images in CS5!
What do you think? Is this a tool that you think could help your business?
If you liked this post, you might like these also!

[…] Stomp blog & FB images. […]