I don’t know when it started happening, but when it did, I was SO excited. Learning how to make my own presets was so beneficial for me and my business. First of all, I could stop downloading free presets that I probably will never use again. I now have an entire set of my own presets, and I pretty much stick to just a few of them now that my style has evolved and that my skills have improved. I do not do a lot of editing, I just do some slight enhancements to the colors, and that’s pretty much it! Anyway, I thought it might be beneficial to share how to create your own presets in Lightroom, in case you didn’t know how!
Step number one:
Once you have your settings where you’d like them to be (exposure, contrast, temp, highlights, etc.), move your mouse over to the left hand tab where it says “Presets.” Click on the “+” button.

Step number two:
Once you’ve clicked the “+” button, this next screen will pop up. Enter in a name for the preset (I keep mine pretty simple and straightforward so I know when to use them), and choose the folder you want it to go into. Once you’ve made sure it’s where you want it to go, and all the correct settings are checked off, then go ahead and hit “create.”

Step number three:
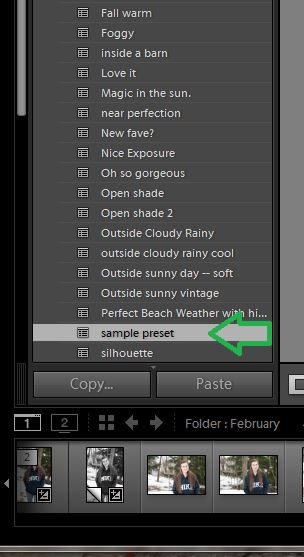
Check to make sure that it has shown up in your list of presets, and test it out! You should be good to go now!

Have fun making your own presets! I really like doing it, because I feel like I have more creative control over the photos, it saves me time, and it is true to my style 🙂
If you liked this post, you might like these also!

[…] That’s it! If you don’t know how to make a preset in Lightroom, check out this blog post HERE! […]