


A few months ago, my husband told me that there has got to be a way to cut down my time spent editing – basically, he was calling me inefficient. Naturally, I was a little defensive, even though I knew, as usual, he was right. I was spending WAY more time in front of the computer than I ever would like. I really enjoy taking the photos of the people, not spending all my time working on the photos themselves (don’t get me wrong, I like to have that extra creative control, but sometimes it just gets a little out of hand!). Ever since that conversation, I’ve made it my ultimate goal to cut down my workflow – significantly. I must say, that I think I’ve finally got it down! By the end of this year, I want to import, cull, edit, export, and blog an entire wedding in under five hours. I’m not sure what I’m at in terms of time right now for weddings, but I think it’s a pretty solid goal for myself! Since I’ve focused on utilizing Lightroom 4 more than I was, I’ve gotten my culling, editing, and blogging for a regular session to about 57 minutes. I’m SO stoked about that!
I decided that tonight, I’d share what I do in Lightroom to help keep things running super smoothly! After all, I’m all about sharing the love and knowledge! If I can help even one person shave a few minutes off their editing time, then I feel very happy about it!
The first thing I have to say about cutting down your time is that you need to have a system in place about how you are going to organize and back up your photos. Without that, you can have a good system for editing, but in reality, you’re just going to be spending that extra time trying to find your files and put them where they should be! But, that is a separate blog post! Onto editing!
Also, as a disclaimer, I am by no means an expert. I am also not telling you how to do things. I am merely showing you how I do it, so that if it happens to work for you, then that’s great! If it doesn’t work for you, then that’s great too!
Culling in Lightroom 4
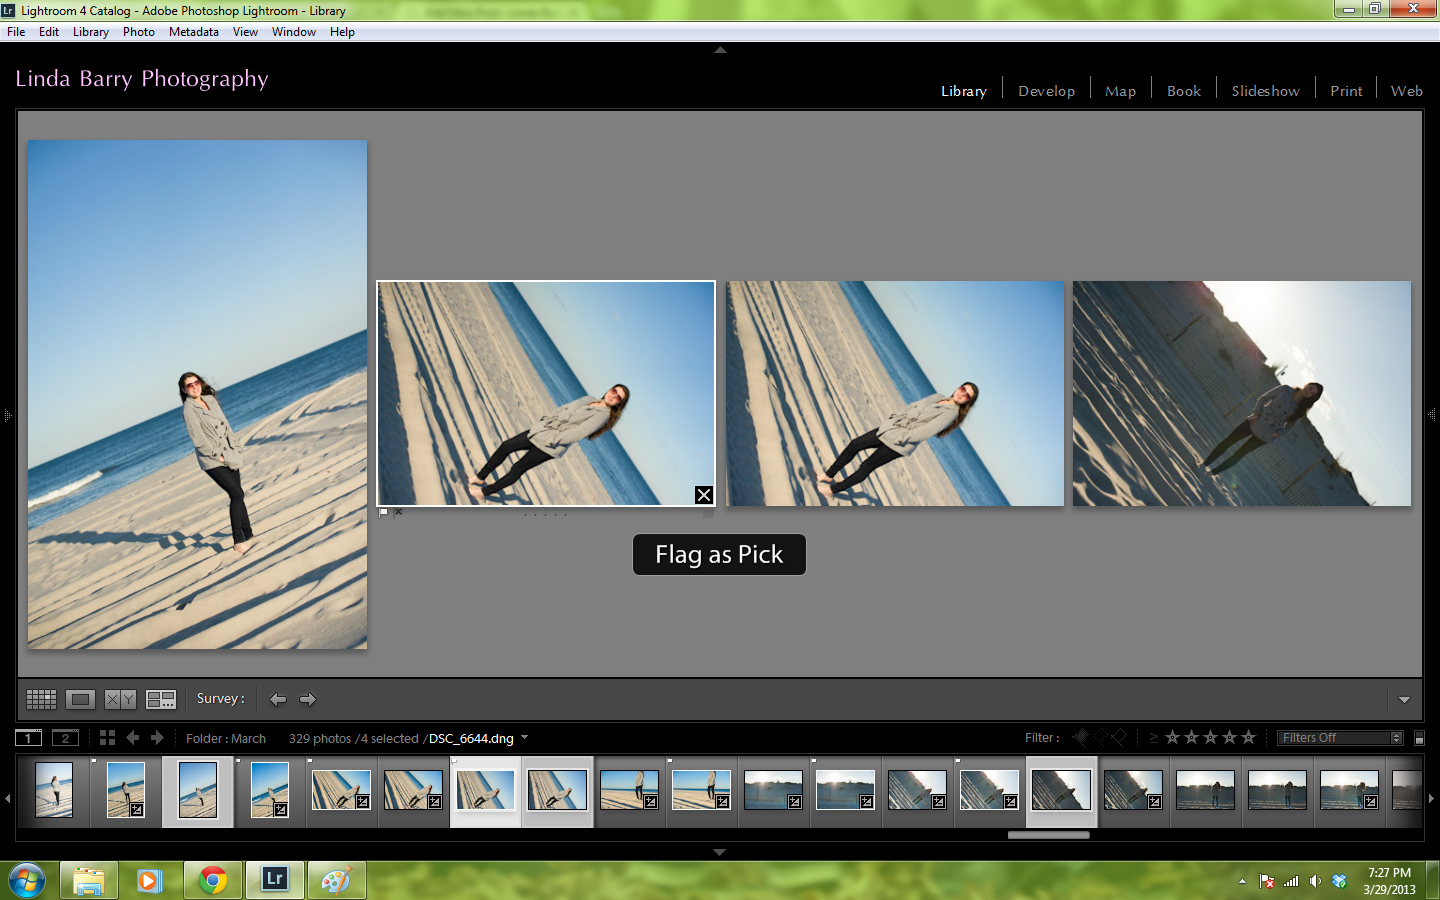
The first thing I do when I import my photos into my Lightroom catalog is put them into survey mode so that I can go through and pick out the photos I want to keep. During this part, I minimize the sidebars and the top bar so that I can see the photos as big as possible.
You must be in “library” mode in order to use the survey function — not develop.

Being in survey mode really helps me look at my photos and pick out the ones I like the best out of a batch of four or six. Once you’re in survey mode, you’ll notice that there is now a white border around your current selection. This is what you’re looking for to tell you you’re moving in the right direction.

In order to look at more than one photo at once in survey mode, hold down your “Ctrl” button and click on the set of photos in a row. Doing this brings up those four, five, or six photos at once for you to look at and make your pick.
This part of my workflow is so critical for me in terms of staying efficient. When I’m in survey mode, if I spend more than three or four seconds on a photo deciding if I want to keep it, I’m taking too long. It’s meant to be a quick process to determine which photos I want, and then I never look back. I know it probably sounds crazy, but I swear it’ll change your life. It changed mine.

So, once you are looking at your batch of four photos, like I am above, when I determine which ones I want to keep, I simply click on the photo (in the big section, not on the bottom bar) and I hit “P” on my keyboard. This flags the photo as a “pick.” This has got to be one of the greatest features in Lightroom. I don’t know what I’d do without it now!
You can also rate your photos. I flag all the ones I want to keep, and then on the photos that are going to go on the blog, I hit “1”, and then “2” for any FB ones, and so on. This makes it SUPER easy when it’s time to export my photos and find them!
Editing in Lightroom 4
Once you’ve made it through all of your photos and you’ve flagged your photos, it’s time to edit them! Now that you’ve gone through and flagged them, what do you do with them? What makes it so special? Well, let me show you!!

Near the bottom right, you’ll see a bar that says something like “filters off” or “unrated.” Once you click on that, it gives you all sorts of options. Click on the “flagged” option. If you want to see the photos you’ve rated as “1”, “2” or more, then you just click on the appropriate number of stars to showcase those photos alone.
 Boom. Now in the bottom bar, you only see your flagged photos! No more going through a bunch of photos you don’t care to work with to get to the good ones! Flipping through photos to get to the keepers would literally take up minutes of my editing!
One of the things I like about Lightroom is how easy it is to create and use presets. I have several presets that I’ve made and use on a regular basis. Typically, when I edit a session, I keep my edit style the same throughout. At least, I try to :p
Once I’ve figured out which preset I want to use (it’s usually my “color pop” or “b&w for real”) I get started. The key to remember to help keep your flow grooving, is you need to apply presets to similar photos at a time. So, for example, in the above photo, I’d work with the first four as a batch because they are all in the same location with the same light and exposure. Then, for the next batch I edit, I’d do the last three photos because those are in the same spot and light, etc. That way I’m not going back and fixing exposures and such for those photos that were taken in a different light or location.
Does that make sense?
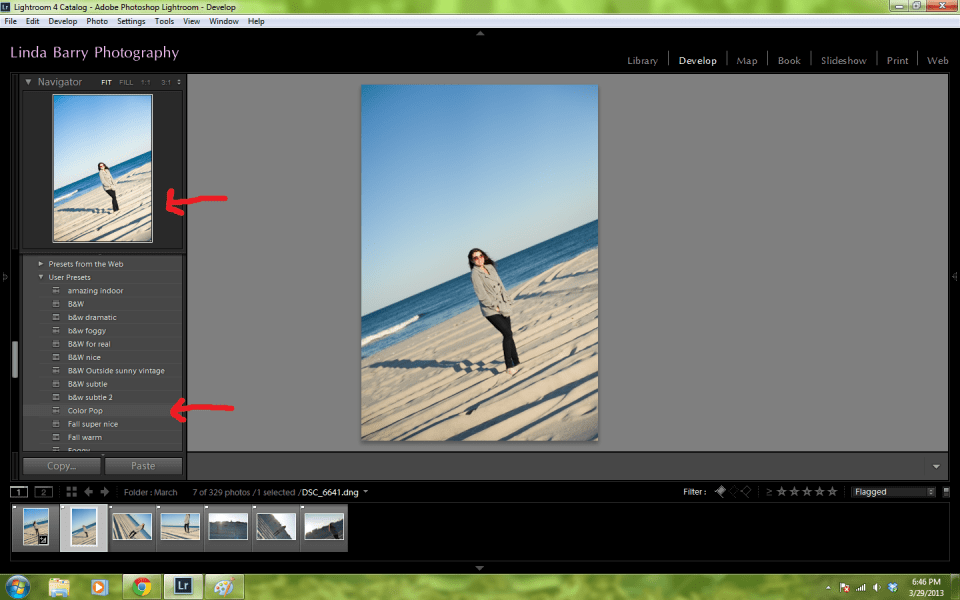 Another thing I loooove about Lightroom is that when you hover over a preset, it shows you a preview in the top left corner, so you can quickly figure out if you’re interested in that particular preset, for that particular photo.
 Once you’ve determined your preset and applied it to the photo, or even once you’ve custom edited a photo, go back to the bottom bar and while you’re holding down “Ctrl,” select the photos you want to have the same edit. This is where you choose the photos with the similar lighting and location. I broke my own rule in the above photo. Oopsie! Once they’re selected, hit the “Sync” button over on the right.

 When the window pops up, hit “Synchronize,” and before you know it, all the selected photos have now been synced with the same edit! How freakin’ awesome is that?! No more do I have to hit copy and paste for each photo! I honestly don’t know how I did it before I learned about these functions.
I’m a much happier camper!
Do you have any tips you can share with me about Lightroom??
If you liked this post, you might like these also!

Oh.my.word! You just rocked my world!
Yay!! I’m so glad to hear that!!